Friday 17 October 2014

Santa Ornament Tutorial

It's coming up to that time of year again and although I no longer sell my work at craft fairs, I do usually get around to making some ornaments for my own Christmas tree.  Last year I made myself a beautiful one from a vintage-looking Santa cabochon and thought I would like to make a similar one as a competition prize but couldn't source the same type of cabochon so ended up making my own, although mine is not a vintage style.  While I was stitching it I took some photos so that I could show you how it is done.  If you'd like to recreate it you can either source a cabochon from somewhere, get one from my Etsy supplies store or make your own like I did.  If you would like the tutorial as a PDF file you can get it as a free download from my Craftsy store.

 You will need:

1                  Santa face cabochon 
2g                Size 11 seed beads, red
5g                Size 11 seed beads, cream
2g                Size 11 seed beads, gold
3 ½ x 3”      Piece of Lacy’s Stiff Stuff or similar
                   Small piece of white felt
3 ½ x 3”      Piece of stiff card
3 ½ x 3”      Piece of Ultrasuede or similar
8”                Piece of red satin ribbon or similar
                   Beading thread


You will also need a beading needle, glue and a pair of scissors,

Template


Trace out the outline of the ornament onto the stiff stuff.


Glue the face cabochon into place and set aside to dry.


Trace out the fur shapes onto white felt.  Cut out 2 pieces of each shape plus an extra piece of just the right side of the collar fur as shown.


Glue the first layer of felt pieces down onto the backing, trying to avoid the edges.  Put the other felt pieces to one side for later.


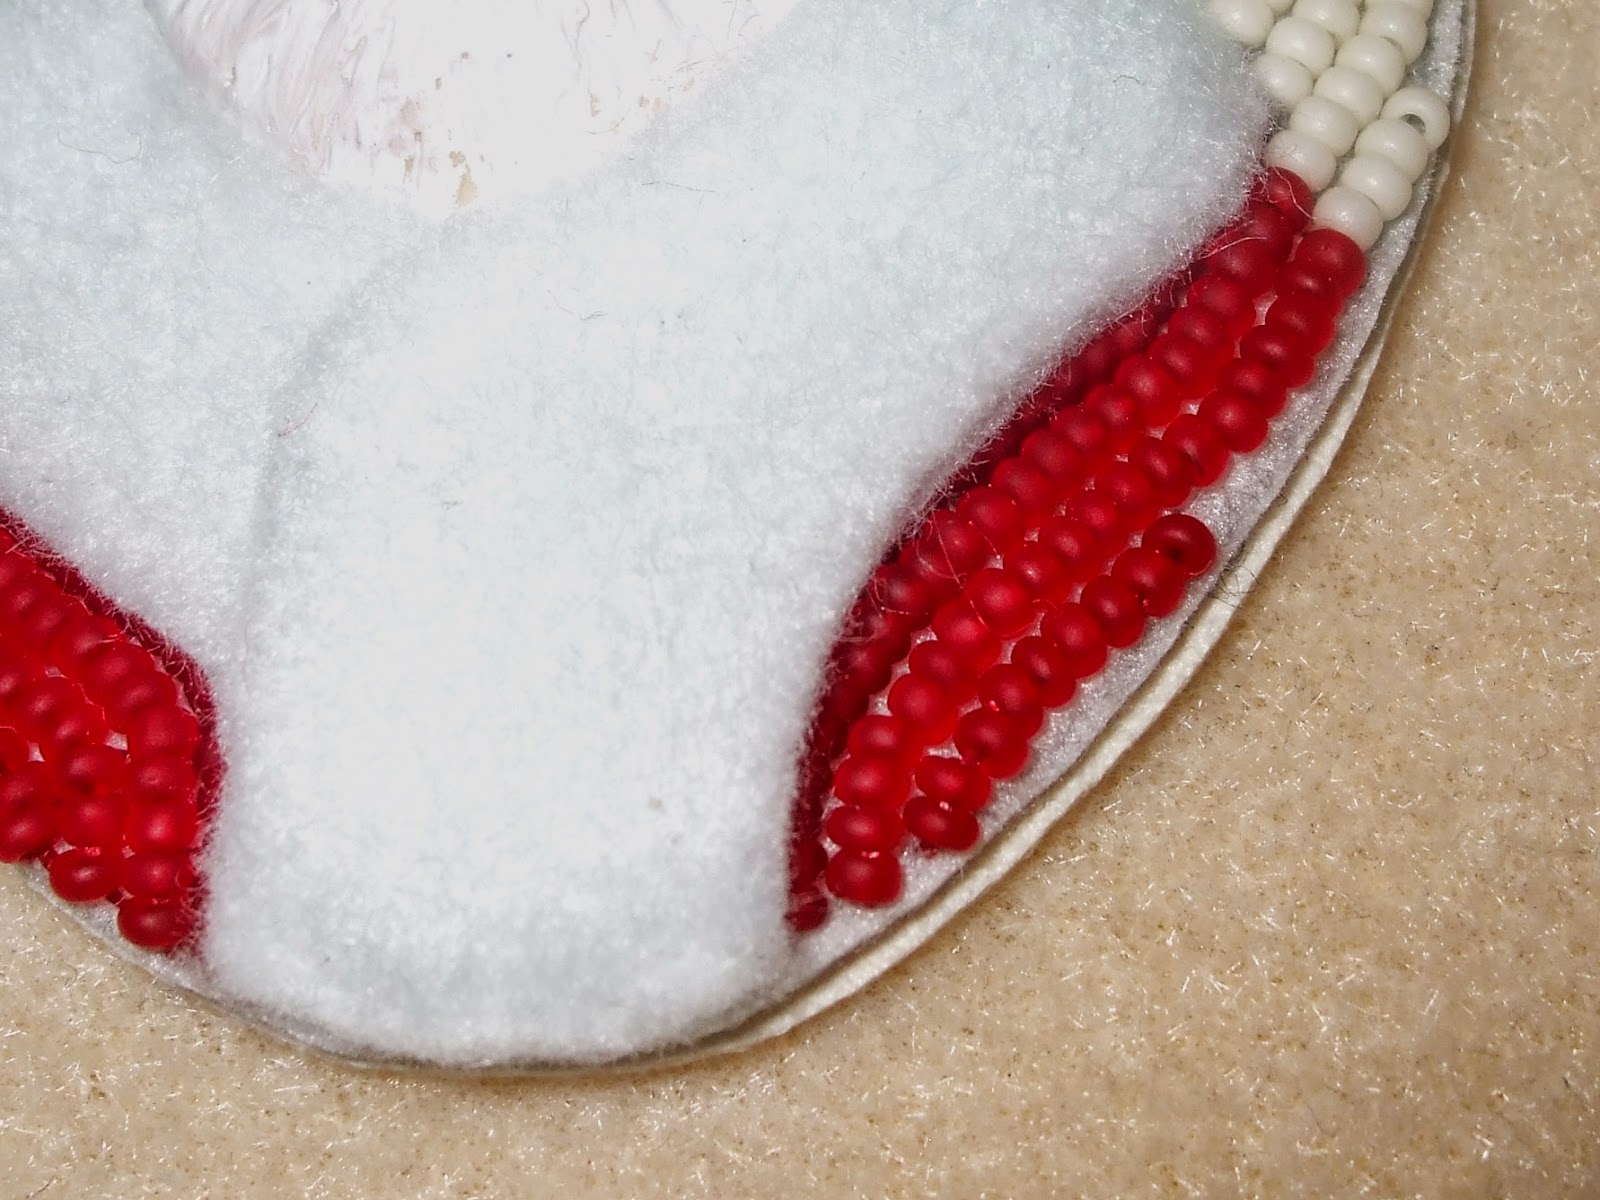
Fill in the red areas of Santa’s suit and hat with red seed beads.


Glue the remaining pieces of felt on top of the first layer, putting the extra piece on last.  Stitch down the edges of the felt that aren’t next to the beads with tiny stitches so that they aren’t noticeable.


Fill in the background with the cream beads.


Trim the backing close to the edge of the beadwork and make sure all the threads are secure.


Place the beadwork onto the card and draw around it.  Cut out the shape 1-2mm inside the line.


Glue the card to the back of the beadwork and leave to dry.


Cover the back of the card with glue, taking care not to get any on the edges of the backing, and stick it onto the ultrasuede.  Trim the edges close to the beadwork.


Finish off the edge by brick stitching the gold beads all the way around the oval.


Add a small loop of gold seed beads to the top centre of the oval and finish off the thread.


Tie the red ribbon through the loop of beads. 


If you do make this for your tree please post a photo of it to my Facebook page so that I can see.  


Saturday 4 October 2014

It's Been A While...

... but at last there is something happening to my studio!

My Dad and Kieran have been in there the last few weeks sorting out the sill on the door and getting everything ready to do the walls.  Last week they built the framework for the plasterboard and got that in on one wall, complete with plasterboard on the bottom half.  The top half can't be done yet because the electrics need sorting out there first, and the window needed replacing.  My Dad has been down today fitting the new window,  Here is what it looks like now:


From the outside

From the inside

Left of wall with plasterboard

Right of wall with plasterboard


On the opposite side of the space it is still quite full of all the usual junk you would expect to find in a garage, although a lot of it has now been moved into the shed out the back.  I can;t wait to get everything moved in there so I have a real space to work in instead of just sitting on the sofa surrounded by boxes of beads.

This year I seem to be making more polymer clay cabochons than jewellery but that has come to a sudden halt with the new addition to our family, Orion.  He is a 4 year old black cat who was abandoned as a tiny kitten and had to be hand reared.  He ended up with the daughter of the woman who found him, who then had to give him up when her young daughter developed an allergy to him.  So far we have kept him indoors but I'm hoping he will be able to go out soon.  He is still a little skittish and will have to have a visit to the V-E-T before we can feel safe letting him outside.


Orion looking unimpressed at being covered in cobwebs!

Hopefully the studio will be finished in the not-too-distant future.  :o)

Monday 26 May 2014

May Goddess and the Bead Retreat

May is always the month that I organise our annual Bead Retreat so I wanted my Goddess for this month to be about that.  This year we stayed at Endmoor Farm for the the whole week and it was lots of fun!  Sitting round a huge kitchen table beading with some of my best friends is always guaranteed to make me smile and this time was no exception.

For my Goddess, I started out by making her a scenic cabochon from polymer clay featuring a little sheep to represent the farm where we stayed (there were lambs being born while we were there and running round the farmyard).  Her face was made in blue and white for the sky.  I used lots of white beads with a little bit of sparkle and a flat backed crystal to represent the fun we all had.  There are 14 multi-coloured fp crystals at the bottom, one for each of us that stayed.  She is a happy little Goddess because I was happy while I stitched her. :o)


The week before we went out there I also made another Goddess.  It was my friend's birthday on the Sunday and I wanted to make her a present so came up with the idea of doing a Goddess with flowers and bees as she likes bees.  I love the Springtime feel to this one and I think she liked it too. :o)


April

I know I'm a little late with my April Goddess, not because she was a problem to stitch, but because she needed a companion piece and he was!

April is the month that we lost my Nanna, then a year later, my Grandad so it always reminds me of them.  It is also the time that lots of daffodils are about - the flowers my Nanna always used to buy me for Easter.  With such a lot of connections to them how could my April Goddess be anything other than a tribute to my Nanna?  The daffodil connection is obvious.  I finished her quite early on but decided it would be unfair not to give her a companion as my Grandparents were pretty inseparable.  He has a lovely colourful heart as my Grandad was a painter and decorator and used lots of colour.  The black and white cabochon represents the humbugs he always used to eat, the poppy is for his army service and the star because that's what he was - and is.


Monday 31 March 2014

March BJP

I must admit, I have really struggled with the Goddess for March.  The first half of the month wasn't memorable at all although I did make some progress with getting out of the house a few times.  Then, around the end of the second week, we found out that Steven was going to have to leave home for work on short notice to cover for the manager of another pub who was off sick.  This other pub is around a 2 hour drive from our house so if he isn't finishing till gone midnight and has to be back there for 9am the day after he really can't get home in between.  He was away for 4 days the first week, 5 last week and that looks like continuing for the foreseeable future.  It has made me feel very much on the edge and I have struggled a bit with it.  I couldn't see what to bead to express myself and kept putting off starting on it.  Then yesterday, Mother's Day here in the UK, everything changed.  Kieran bought me the most beautiful little planter filled with bright pink cyclamen and a painted box frame full of really pretty butterflies made from beautifully patterned paper - all picked out and paid for by himself.  It made my day!

The Goddess that grew from my newly discovered good mood is pretty and happy and feminine.  Born out of the love between mother and son.


I made the cabochon for her belly from a photograph of the cyclamen for my present so I will always have a reminder of them.  The heart is a clear AB one - light and bright - and has a lacy edging.  She has a flower embellishment on her head to represent the cyclamen flowers, and the butterflies are a reference to the picture part of my present.

I am really pleased with how she turned out and she will be a lovely reminder of a special day.  :oD

I wonder what April will bring...

Saturday 8 March 2014

More Faces

So, I'm still playing with the clay.  I haven't picked up my beads in almost a week!  :oO

These are the latest face cabochons.


I asked if my friend wanted them all to be realistic looking but she said not so I've given some of them a real fantasy look with odd coloured eyes and lips and I've added crystals to a few too.  I am having lots of fun with these at the minute although I am missing my beads.

Tuesday 4 March 2014

Embellished Face Cabochons

I've been working on something new lately and have just got the first few finished.  A friend asked me if I could make her some polymer clay face cabochons, but turned to the side instead of straight on.  I found a mould that had a face in profile and, when it came, I made one face but realised it would be too big and the wrong shape for what I needed so I adapted it and cured it, then made my own mould from two-part silicone.

Using my mould gives me a basic shape to work with and from there I embellish the face with all sorts of small bits and pieces to give it character, then cut around the edges and cure it in the oven.  Once cooled, the details are painted on and allowed to dry, then they are varnished on the front to give them some protection and keep all the colours nice.

What do you think?


Each one takes around 3 hours to make so they are quite time consuming but worth the effort.  These ones are destined for my friend but hopefully I will be selling some through my Etsy store soon.  If you have any ideas for decoration/themes please let me know.  If I get enough suggestions before the end of next week (15 March) I will do a draw and the winner will get their idea made up for them.